
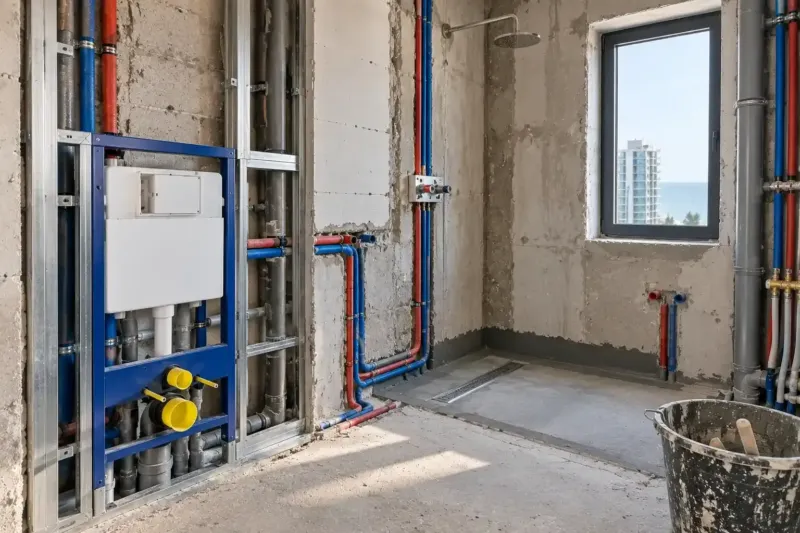
Walk-in shower in Batumi: fall, floor drain and glass
We build walk-in showers without a tray in Batumi, level with the bathroom floor: we choose a floor drain to suit the floor height and tile format, form the fall with screed or a ready-made base, bed the drain into the waterproofing and fit the glass on built-in backing. Labour for the shower area costs from 2,100 ₾, with tiles, drain and glass extra. The shower gets a water test before tiling and another one after, at full shower head pressure.
from 2 100 ₾labour: fall, waterproofing, fitting the floor drain, tiling; tiles, drain and glass extra. The final price is confirmed once agreed.
- Timeline: about 3 weeks for a 90×120 cm shower area with screed; with a tile-ready shower tray, roughly a week faster
- Warranty: A 2-year warranty on the work, 5 years on the drain pipe in the floor
Who it’s for
You are taking out the developer's bath and want a shower flush with the floor, with no upstand or curtain
You already have a shower, but after every use water stands in a puddle in the far corner and creeps towards the door
The apartment is let short-term, and guests need a shower that can be cleaned in five minutes
The shower glass has to hang on a plasterboard partition, and you aren't sure it will hold
You want a rain shower and aren't sure the floor drain will cope with that much water
What’s included
- choosing the floor drain by floor height, tile format and shower head flow rate
- connecting the drain to the waste pipe and a water test of the joint before screeding
- screed laid to a fall on guide rails, or fitting a tile-ready shower tray
- perimeter strip around the edges and a moisture check of the base
- two-coat waterproofing with a drain collar and tapes in the corners and at pipe outlets
- tiling the shower floor and walls, cut to the fall, with epoxy grout
- built-in backing for the glass in a plasterboard partition
- fitting the glass screen and sealing the fixing holes
- a test at full shower head pressure and a video for the handover file
Floor drain, tiles and glass are decided together
A walk-in shower without a tray in Batumi, level with the rest of the bathroom floor, rests on three decisions, and they can't be taken one at a time. The floor drain sets the direction of the fall, the fall sets how the tiles are cut, and the glass goes where the fall ends. So at the site measurement we choose everything at once and draw two finished floor level marks on the wall: one at the grate and one at the far edge of the shower.
For a 90×120 cm shower with a linear drain along the short wall and a fall of 1.5–2%, the far edge comes out 18–24 mm higher than the grate. We build up this difference only in the shower area, and the rest of the bathroom floor stays level. How to choose between a bath, a shower tray and a walk-in shower without a tray is covered on the page about complete bathroom renovation.
Which floor drain we fit and why
In the drain's data sheet we look at the body height, the outlet diameter and the flow capacity, and we check the capacity against the shower head's flow rate. The units differ: a shower head is rated in litres per minute, a drain in litres per second. A rain shower head at 20 l/min gives 0.33 l/s, and we choose a drain for it with a margin, otherwise the water rises above the grate and spreads towards the glass.
We use a drain body with a flange for waterproofing and, where there is a choice, with secondary drainage holes: through them, water that has seeped through the joints into the adhesive finds its way into the drain. We set the grate 1–2 mm below the tiles, otherwise a ring of water stays around the outlet.
The fall: screed to guide rails or a ready-made base
The usual method is a sand and cement screed laid to guide rails with a fall towards the drain, with a perimeter strip around the edges. For the first week we let the screed cure, then dry it, and we start the waterproofing when the moisture meter and the compound's technical data sheet allow it, not the calendar.
The second method is a tile-ready shower tray: a ready-made board of extruded polystyrene with a factory-formed fall and a floor drain included. It is bonded on a full bed of adhesive to a level base, the joints are taped over, and there is no week of waiting for screed to dry. The downside is that the factory sets the dimensions, and a tray like this can't be adapted to a shower of non-standard shape.
Waterproofing in the shower area
In a shower the floor gets wet every day, so here we apply a flexible cementitious coating instead of a polymer membrane, and we take it across the whole bathroom floor, not just the sloped area. We bed the drain flange in between the first and second coats. This is where the drain body and the layer become one piece, and when a walk-in shower without a tray leaks, the leak is most often at this joint.
Holes for the glass fixings and shelves go right through the layer, so we fill each one with sanitary silicone before the anchor goes in. In the shower area we replace the developer's gypsum plaster with cement plaster; more on this on the page about white frame renovation. Tapes, collars and the water test of the layer are covered in the article on bathroom and balcony waterproofing.
Tiles on a fall
With a linear drain the fall runs in a single plane, and the boundary between the shower and the rest of the floor comes out straight: we line it up with a joint and put the glass just behind it. With a point drain there are four planes, the tiles are cut along diagonals towards the outlet, and the larger the format, the more these cuts show. Heavy slabs on a fall are covered on the page about large-format porcelain tiles.
We cut the insert for a tile-in drain grate from the same tile, so the pattern and joints carry on across it. Around the outlet we spread adhesive on both the base and the back of the tile: a void under a tile on a wet floor turns into a crack over time.
Glass: where it goes and what holds it
We make the screen from 8–10 mm toughened glass. A ready-made walk-in panel 70–100 cm wide works if the line of the glass runs along a level part of the floor. If the glass crosses the fall, it is made to measure with an angled bottom edge, or set in a profile that takes up the difference. It is measured only once the tiles are down.
In concrete and aerated concrete block we fix the profile and the support bar with anchors. In a plasterboard partition we build in a timber batten or a metal backing plate before tiling, otherwise the glass gradually works loose. If limescale shows up on the glass within a couple of days, it is worth looking at water treatment in the apartment.
Three water tests and sign-off
The first test comes before the screed: we pour buckets of water into the drain body and check its joint with the waste pipe and the riser. The second is on the waterproofing, with water standing on the floor for 24 hours. The third comes after the tiles and glass: the shower head runs at full pressure for 10 minutes.
At sign-off the water doesn't rise above the grate or reach the glass, and once the shower is off, only drops are left on the floor. Water getting past the glass means a screen standing on a fall without a seal. Joints that darken around the drain a few weeks later often mean the flange wasn't bedded into the waterproofing. We film the third test for the handover file.
How much a walk-in shower without a tray costs in Batumi
Labour for the shower area costs from 2,100 to 3,000 ₾: the fall, waterproofing, fitting the floor drain and tiling. That is the price of the work. You buy the tiles, drain and glass yourself, or leave the purchasing to us as a separate line in the estimate.
A ready-made 70–100 cm walk-in glass panel costs 600–780 ₾, plus 290–360 ₾ for installation, and made-to-measure 8–10 mm glass comes to 1,860–2,640 ₾. A tile-ready shower tray with a floor drain instead of screed costs 695–970 ₾ for labour. Moving the outlet to the far wall, a linear tile-in drain and mosaic push the price up; a drain next to the riser and ready-made glass bring it down. The final cost is set after the site measurement and once the estimate is agreed, when we can see how much height the floor has and how far away the riser is.
Stages and timelines
-
Measurement and shower layout
1 day
We measure the height available and the route to the riser, check the shower head flow rate, choose the drain and mark out the fall area and the line of the glass.
-
Floor drain and waste pipe
1 day
We set the drain body to its level, run the waste pipe to the riser with a fall and test the joint with water.
-
The fall
7–10 days
We lay the screed to guide rails, let it cure for a week and dry it to the right moisture level. A tile-ready shower tray used instead of screed is bonded in a single day.
-
Waterproofing
3 days
We apply two coats of flexible compound with the drain collar and tapes, flood the floor for 24 hours and film the test.
-
Tiling
4–5 days
We lay the tiles from the drain outwards, grout the joints with epoxy and seal the junctions with silicone.
-
Glass and handover
1 day
We fit the screen, test the shower at full pressure and hand it over with a signed certificate. Made-to-measure glass is measured on the finished tiles and fitted once it has been made.
Local specifics in Batumi
In summer, guests rinse beach sand off in the shower, and it builds up in the drain's trap faster than hair does. In apartments let short-term we fit a drain whose hair catcher and trap lift out from above without tools, and we add a check of the hair catcher to the cleaning checklist after every checkout.
Floor slabs in new high-rises keep deflecting for the first few years, and a screed laid to a fall is rigidly tied to the drain body. To stop a crack opening up around the outlet, we separate the screed from the walls with perimeter strip, use a flexible tile adhesive and seal the corner between floor and wall with silicone rather than grout.
If the apartment is being got ready for the season, we put the glass order into the schedule straight after tiling. The glass is measured only on the finished tiles, making it takes time, and without that margin the shower may meet its first guests without a screen.
Materials and brands
We choose a drain with a polypropylene body and a stainless steel grate: chrome-plated plastic peels over time under bathroom cleaners. An apartment that stands empty for long spells in winter needs a drain body with a dry seal in addition to the water seal. The compound, tapes and drain collar come from one system, Ceresit or Mapei, otherwise the tape may not bond well with the compound on the flange.
The tile adhesive on a fall is flexible and the grout is epoxy; Mapei and Litokol make it in colours to match porcelain tiles. We tile the shower floor with matt or anti-slip porcelain tiles, which you can choose in person at the VitrA showroom in Batumi. The glass is always toughened, and the profile, clips and support bar are stainless steel.
What makes up the cost
Timeline: about 3 weeks for a 90×120 cm shower area with screed; with a tile-ready shower tray, roughly a week faster
- the wall area of the shower affects the estimate more than its floor area
What raises the cost
- a linear drain with a tile-in grate and a low body
- moving the outlet to the far wall, a long way from the riser
- made-to-measure glass and built-in backing in a plasterboard partition
- mosaic or large porcelain tiles cut to the fall
- removing an old bath and screed in a resale apartment
What lowers the cost
- the drain goes next to the riser, with no outlet to move
- a ready-made walk-in glass panel on a level part of the floor
We prepare the exact estimate from measurements and photos. It’s free and comes with no obligation.
Get an estimateGuarantees
A 2-year warranty on the work, 5 years on the drain pipe in the floor. If a leak comes through waterproofing or a drain joint that we made, it is a warranty case: we locate it from the photos in the handover file, usually open up only that area and restore the tiles at our own expense. The drain, glass and fittings carry the manufacturer's warranty. Cleaning the trap and replacing darkened silicone are routine care and aren't covered.
Questions and answers
How much does a walk-in shower without a tray cost in Batumi?
Labour for a walk-in shower area without a tray costs from 2,100 to 3,000 ₾: the fall, two-coat waterproofing, fitting the floor drain and tiling. That is the price of the work, without the tiles, drain and glass. A ready-made 70–100 cm walk-in glass panel costs 600–780 ₾, plus 290–360 ₾ for installation, and made-to-measure 8–10 mm glass comes to 1,860–2,640 ₾.
The final cost is set after the site measurement and once the estimate is agreed. A photo doesn't show how much height the floor has or how far away the riser is, and that decides whether screed in the shower area is enough or the floor has to be raised across the whole bathroom.
Why does water stand in a walk-in shower after use?
Most often the fall is to blame. If a puddle stays in the far corner, the screed there was laid flat or with a reverse fall, and the water doesn't reach the drain. If water stands right by the grate, the drain was set higher than the tiles or the trap is blocked. Water draining slowly under a rain shower means the drain's flow capacity is lower than the shower head's.
A blockage or a high grate can be fixed without opening anything up. The fall can only be corrected by relaying the tiles in the shower area, so we test it with water before tiling, and after tiling at full shower head pressure.
Can a glass shower screen be hung on a plasterboard wall?
Yes, if it was planned before tiling. A square metre of glass 1 mm thick weighs about 2.5 kg, so a 90×200 cm panel weighs about 36 kg at 8 mm and 45 kg at 10 mm. We build a timber batten or a metal profile into the frame along the line of the fixings, and use moisture-resistant board. The screws for the profile and the support bar go into this backing, not into the plasterboard alone.
If the wall is already tiled, we find the backing from the photos of concealed work. If there isn't any, the screen is fixed to the floor and to a structural wall, and the support bar runs to the ceiling or to a neighbouring concrete wall.
How do I clean a shower floor drain, and how often?
The grate comes off by hand or with the hook supplied, and underneath are a hair catcher and a removable trap. Take them out, rinse them under the tap and push them fully back into place. Drain-cleaning chemicals are rarely needed here: the hair stays on the catcher, and it is easier to pull it off by hand.
Clean the hair catcher every one to two weeks and the trap every few months, or straight away if the water starts draining more slowly. A ring of shampoo and soap on the walls of the trap comes off with hot water and a brush. If the trap can't be lifted out from above, the drain was fitted without servicing in mind.
Does a bathroom with a walk-in shower need a threshold?
A high threshold isn't needed, but we always protect the doorway. We take the waterproofing across the whole bathroom floor, up the walls and into the door opening, and keep the floor at the entrance a few millimetres below the hallway or fit a low threshold strip. If the drain blocks, the water stays in the bathroom and doesn't get under the hallway flooring.
The fall and the glass do most of the work: water from the shower goes into the drain within the shower area, and only splashes reach the door. If you want the bathroom and hallway floors flush, we work out the length of the glass and the direction of the shower head with particular care.
Further reading
Send photos of the bathroom and the floor height at the door, and we'll choose a drain and price the shower
We reply within an hour during business hours. Message us or leave a request: we’ll call you back, go over the details and suggest the next step.
Mon–Fri 10:00–19:00, Sat 11:00–16:00