
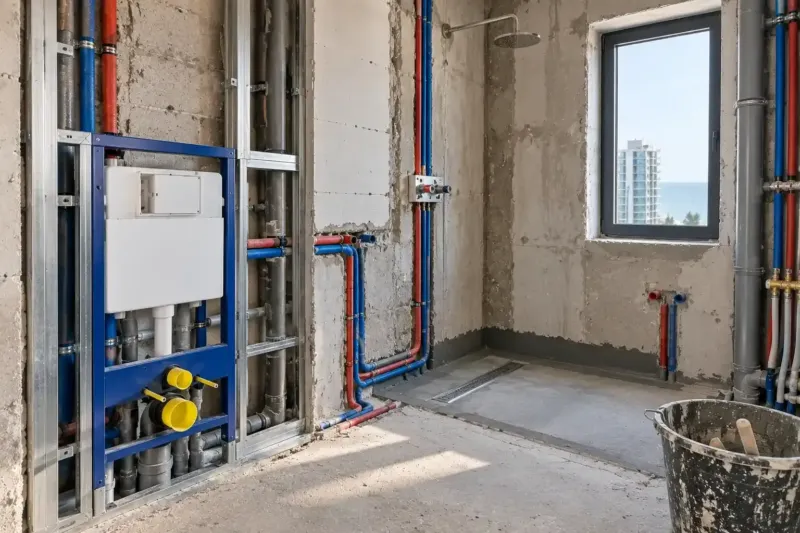
Bath installation in Batumi
Bath installation in Batumi: we set acrylic, steel and cast-iron baths on a frame or legs, fit the waste and overflow, seal the joint with the wall and build a panel with access to the trap. Labour costs from 175 ₾, and the bath itself, the panel and the mixer are not included in that price. Before handover we fill the bath above the overflow and check that the bottom doesn't flex and it is dry under the trap.
from 175 ₾/pclabour only: installation and connection, with the bath, panel and mixer extra. The final price is confirmed once agreed.
- Timeline: 1 day for installation and the waste, plus 24 hours for the seal with the bath full; 3–4 days with a tiled panel
- Warranty: A 2-year warranty on the bath installation and its waste
Who it’s for
The bathroom is ready for installation, and the acrylic bath you have bought needs fitting with a panel
Your resale apartment has an old cast-iron bath that needs breaking up and carrying out, and a new one put in
The silicone between the bath and the wall has turned black, and water is getting under the bath
Your acrylic bath flexes and creaks: the previous tradesman set it on bricks
You are running the renovation from abroad and want to see on video how the bath passes its water test
What’s included
- checking the dimensions of the recess, the drain outlet and the mixer outlet
- assembling the frame or legs to the manufacturer's instructions
- levelling the bath along and across the rim
- assembling and connecting the waste and overflow
- waterproofing tape along the rim, or a silicone seal applied with the bath full
- setting out the panel and the hatch opposite the trap
- testing the overflow, draining a full bath and checking under load
- bath and waste models recorded in the handover file
What we check before the bath is brought in
A bath goes onto a waterproofed floor, and the membrane must run under the whole bath and up the walls behind it. Once the seal along the rim ages, water gets under the bath every time someone showers, and without waterproofing it goes into the floor slab and down to the neighbours. How this layer is applied and tested with water is explained on the page about waterproofing wet areas.
Before a bath installation in Batumi, we check three dimensions. The recess must be a few millimetres longer than the bath, no more: a wide gap at the end can then only be filled with a thick bead of silicone. The drain outlet must be placed so that the bath trap reaches it with a fall, without running uphill. In our experience, the outlet for a wall-mounted mixer should be 15–20 cm above the rim, so that a bucket fits under the spout.
Frame and legs
We assemble an acrylic bath's frame to its manufacturer's instructions and adjust the legs so that the bottom rests on all the cross bars rather than hanging on two. The check is simple: we stand in the empty bath, and the bottom must not flex. We don't use brick or foam supports instead of the bath's own frame: the manufacturer designed the bottom for its frame, not for point supports.
A steel or cast-iron bath stands on its own legs directly on the tiles, with rubber pads under the feet so that the glaze doesn't chip and the floor doesn't drum. Under each leg of a cast-iron bath the tile must have no voids in the adhesive, otherwise the point load will crack it, so we tap-test the floor at these spots in advance. We connect the body of a metal bath to the equipotential bonding, and the conductor for this is put in at the rough stage.
Level rim and waste
The bottom of the bath already has a fall towards the plughole, so we set the bath itself dead level, along and across the rim. A tilt “for better drainage” shows on the tiles: the grout line above the bath rises at one end, and the eye catches it at once.
We assemble the waste and overflow before the bath goes against the wall, while there is still room to get at them with a spanner. We check the overflow seal separately: water rarely reaches it, and a leak there is usually found only when a stain has already appeared on the neighbours' ceiling. We connect the trap to the drain with a fall and leave access to it.
The joint with the wall
The joint between the rim and the wall is what leaks most often, so we try to install the bath before the walls are tiled. We tape the rim and the wall above it with tape from the same system as the floor waterproofing, and lay the bottom row of tiles over the rim. Water then runs down the tiles straight into the bath and hardly ever reaches the joint.
If the tiles are already on, we push the bath tight against them and seal the gap with sanitary silicone. Before that we fill the bath with water so that it settles under the weight, and we apply the seal with the bath full: when it is filled later, the silicone won't stretch. We don't stick a plastic trim strip on silicone in place of a proper seal: damp lingers under it, and it darkens.
Bath panel and access to the trap
We build a tiled bath panel on a frame of metal profile and moisture-resistant board, and tile it with the same tiles as the walls. At the bottom we make a toe recess, so you can stand right up against the bath when washing a child or cleaning the bath itself. Opposite the trap we cut out a tile-ready access hatch.
The panel must not press on the rim. We leave a silicone joint between its top and the bath, otherwise a full bath settles onto the panel and the tiles on it crack.
Replacing an old bath in a resale apartment
We decide how to get the old bath out at the site measurement. Steel and acrylic baths are carried out whole. With a narrow staircase or a small lift, a cast-iron bath is often easier to break up on the spot under a heavy cover, so that chips of enamel don't fly about. The pieces go out in bags along with the rest of the construction waste.
Under an old bath there is often something that couldn't be seen at the measurement: a cast-iron outlet in the floor, wet screed, no waterproofing at all. We replace the cast iron with plastic, dry out the base and only then apply the waterproofing. If you are keeping the tiles around it, we choose a new bath to fit the old recess and refit the mixer and shower head; that work is in the section on fitting mixers and other sanitary ware.
How we sign off an installed bath
- the rim is level in both directions;
- water filled above the overflow hole goes into the trap, and the seal stays dry;
- a full bath drains without gurgling, and it is dry under the trap when you look through the hatch;
- you can stand in the empty bath, and the bottom doesn't flex or creak;
- the seal at the wall is continuous, with no bubbles or gaps.
We record the models of the bath, frame and waste in the handover file. If we are doing the whole bathroom, the installation is one stage of the bathroom renovation and is signed off together with it.
How much bath installation costs in Batumi
Bath installation costs from 175 to 240 ₾ for labour: assembling the frame or legs, levelling, fitting the waste and overflow, connecting to the drain and sealing the joint. The bath itself, the panel and the mixer are not included in this price. A tiled bath panel on a frame is priced separately, at 300–420 ₾, and removing the old bath and carrying it out costs 155–240 ₾. If there is no waterproofing under the bath, we price it by area, at 30–42 ₾ per m².
The price moves towards the upper end with a cast-iron bath, a corner or asymmetric shape, or moving the outlet to suit the waste of the new bath. A standard-size acrylic bath in a ready recess on the developer's outlets comes out lower. The final cost is set after the site measurement and once the estimate is agreed.
Stages and timelines
-
Measuring the recess and outlets
1 day
We measure the recess, look at the drain outlet and the mixer outlet, and check whether the bath will fit in the lift and through the door.
-
Preparing the base
2–3 days
We check the waterproofing under the bath and on the wall behind it. If there is none, we apply it and keep water on the floor for 24 hours.
-
Assembly and installation
1 day
We assemble the frame and the waste, set the bath level and connect the trap to the drain.
-
Sealing the joint
1 day
We stick on tape for the tiles to go over, or apply silicone with the bath full and let it cure.
-
Bath panel
2–3 days
We build the panel frame, tile it and cut out a hatch opposite the trap.
-
Testing and handover
1 day
We test the overflow, the waste and the bottom under load, and hand over the work with a signed certificate on site or by video call.
Local specifics in Batumi
A 170 cm bath goes into a passenger lift standing on end, and it may not fit in a small lift car, while a cast-iron one is better taken up in a service lift. So at the site measurement we measure the lift car and ask reception whether the building has a service lift and at what times it is available.
If your hot water comes from an electric water heater, we check its capacity against the bath before you buy. A 50-litre tank heated to 55–60 °C, mixed with cold water, gives about 80 litres of bathing water at 40 °C, while a 150–170 cm bath holds roughly 150–200 litres up to the overflow. That is enough warm water for half a bath or less, so for a large bath people choose a water heater of 100 litres or more. A combi gas boiler will fill the bath, but the hot flow will be weaker than the cold, and filling will take longer.
We break up an old cast-iron bath and drill the tiles for the panel frame during the hours when noise is allowed: by law from 08:00 to 23:00, or shorter if the building's rules say so.
Materials and brands
Acrylic baths are made either from cast acrylic or from composite plastic with a thin acrylic layer on top. You can see the difference at the cut edge of the overflow hole: cast acrylic has a thick top layer, while on a composite bath the acrylic is a thin film. Cast acrylic lasts longer, and a scratch on it can be polished out, while a thin layer quickly wears through to the base when polished.
We choose a steel bath with a thicker wall: a thin one drums more and flexes under weight. The waste and overflow are brass or heavy-duty plastic, and we connect the overflow with a smooth flexible pipe, not thin corrugated tube. The seal needs sanitary silicone with an antifungal additive: in a damp bathroom, ordinary silicone darkens within a season.
What makes up the cost
Timeline: 1 day for installation and the waste, plus 24 hours for the seal with the bath full; 3–4 days with a tiled panel
- for a freestanding bath, the outlets are laid in the floor before screeding
What raises the cost
- a cast-iron bath: carrying it up without a service lift and levelling it with three people
- breaking up and carrying out an old cast-iron bath
- a corner, asymmetric or freestanding bath
- moving the drain outlet to suit the waste of the new bath
- a tiled bath panel with a toe recess and a hatch
What lowers the cost
- a standard-size acrylic bath in a ready recess on the developer's outlets
We prepare the exact estimate from measurements and photos. It’s free and comes with no obligation.
Get an estimateGuarantees
A 2-year warranty on the bath installation and its waste. If the seal at the wall opens up or the waste leaks because of the installation, we put it right at our own expense. Drain pipes we have laid in the floor under the bath carry a 5-year warranty as concealed services. The bath itself and its frame carry the manufacturer's warranty.
Questions and answers
How much does bath installation cost in Batumi?
Bath installation costs 175–240 ₾ for labour: the frame or legs, levelling, the waste and overflow, connection and the seal at the wall. If you buy the bath through us, a 150–170 cm acrylic bath with installation comes to 1,920–2,520 ₾.
A tiled panel, removal of the old bath and fitting the mixer are priced as separate lines. We give a preliminary price from photos of the recess and the bath model, and the final cost is set after the site measurement and once the estimate is agreed.
How do you close a large gap between the bath and the wall?
Silicone can hold a gap of a few millimetres. Any wider, and it sags, tears and darkens, so we don't make a thick seal. If the wall is being retiled anyway, we lay the bottom row of tiles over the rim on waterproofing tape, and the gap disappears.
If you don't want to touch the tiles, we fill the gap with a stiff backer rod or a strip of moisture-resistant material and cover it with a ceramic border tile fixed with adhesive. Expanding foam is no good here: it soaks up water and crumbles over time.
Why does an acrylic bath creak and flex?
Usually its supports aren't doing their job. The frame legs have worked loose or aren't at the same height, and the bottom rests on a single cross bar. Sometimes the bath was installed with no frame at all, on bricks or expanding foam.
We remove the panel, readjust the legs and tighten the fixings. If the original frame is missing, we find a frame to suit the model or fit a new bath: on bricks the bottom will keep flexing, and the seal at the wall will tear every time the bath is filled.
Can a bath go where a shower cubicle used to be?
Usually yes, if the recess is not shorter than the bath. First we look at the outlet: a cubicle usually drains in the middle of the tray, while a bath drains at one end, and the new trap has to reach the drain with a fall. Sometimes the outlet has to be moved, and that means opening up the floor.
The second question is the walls and floor. Under a cubicle the floor is often left untiled, and there is no waterproofing behind its walls, since there was glass there. A cubicle often came with its own mixer on hoses, so a bath needs a mixer outlet in the wall. All of this becomes clear after the strip-out, and then we draw up an exact estimate.
Can you install a freestanding bath in an apartment?
Yes, if it is decided before the screed. With this kind of bath, the waste and water come out of the floor, so the drain outlet is laid in the screed with a fall to the riser, and the floor around the bath is waterproofed in full, not just underneath it.
There are limits too: the further the bath is from the riser, the higher the floor rises, and it needs space around it for cleaning on all sides. A cast-iron or stone freestanding bath is checked by our engineer, because its weight with water bears on a small area of the floor slab.
Further reading
Send photos of the recess and the bath model, and we'll price the installation within 24 hours on business days
We reply within an hour during business hours. Message us or leave a request: we’ll call you back, go over the details and suggest the next step.
Mon–Fri 10:00–19:00, Sat 11:00–16:00