
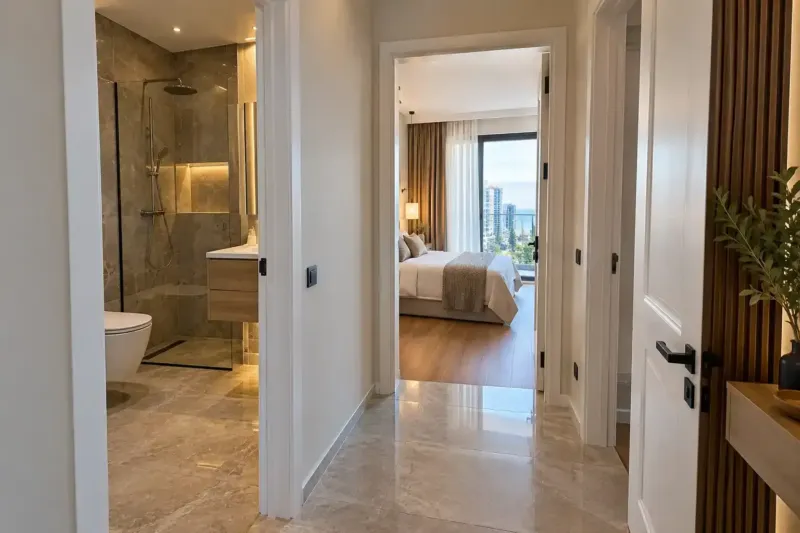
Kitchen renovation in Batumi built around your units and appliances
We do kitchen renovation in Batumi around a specific set of units and appliances: separate circuits for the hob, oven and dishwasher, water and drains to the furniture maker's design, a hood duct with a non-return valve, splashback and floor. A kitchen of about 10 m² without furniture costs from 5,400 ₾. A made-to-measure kitchen is priced separately, and we prepare the walls and outlets so that it goes in without adjustments on site.
from 5 400 ₾/roomkitchen of about 10 m²: labour and rough-work materials, units extra. The final price is confirmed once agreed.
- Timeline: 3–5 weeks to renovate a kitchen of about 10 m² without moving the sink; the units take 3–5 weeks to make after measuring, partly in parallel
- Warranty: 2 years on the work, 5 years on concealed pipes and wiring
Who it’s for
Your apartment is in white frame, and the developer's water outlets and sockets don't match the future kitchen
In a resale apartment the old kitchen has one socket for the whole worktop, and you are putting in an induction hob and a dishwasher
The kitchen units are already ordered, and the furniture maker needs flat walls, a level floor and outlets exactly to the design
You are opening the kitchen into the living room and moving the sink closer to the window or into an island
The apartment is for rent, and the kitchen needs a dishwasher and a splashback that can take frequent cleaning
What’s included
- reviewing the kitchen design and the appliance list
- removing the old kitchen and finishes
- separate circuits for the hob, oven and dishwasher
- sockets above the worktop and a cable for the cabinet lighting
- moving water and drains, with a separate valve for each appliance
- a hood duct with a non-return valve
- levelling the walls square, and screed
- a splashback in tiles, porcelain or glass
- floor covering across the whole kitchen
- connecting the appliances after the units are fitted
Before the first channel is cut: the kitchen design and the appliance list
We start a kitchen renovation in Batumi on paper. Sockets, water, drains and the hood duct go where the sink, dishwasher, hob and oven will be, and that is decided by the kitchen design drawing. It must show the width of each unit, the worktop height and the appliance models. The drawing is made by a furniture maker or a designer, and you can also order it as part of a design for a single room.
The models matter because appliances have different requirements. An integrated fridge needs its socket in the next unit: behind the carcass it can't be reached later. A dishwasher needs its own valve and a drain connection to the sink trap. For an oven in a tall housing unit the socket goes higher than for an oven under the hob. If you order a made-to-measure kitchen from us, it is designed together with the electrics and outlets. A design from another furniture maker we check against the apartment before work starts.
Electrics for kitchen appliances
In the evening the hob, oven, dishwasher and kettle are often on at the same time. One shared circuit can't carry that load, so the powerful appliances get their own circuits from the consumer unit with their own breakers, and the kitchen sockets are connected through an RCD (residual current device).
- hob: its own circuit in a heavier cable, with the connection point in the base unit under the hob;
- oven and dishwasher: their own circuits, with sockets in the next unit so the appliance can be pulled out and unplugged;
- the work area: a group of sockets 15–25 cm above the worktop, which at the usual worktop height is about 1050–1150 mm from the floor, not above the sink or the hob;
- a cable for the wall-cabinet lighting and a socket for the hood above the cabinets;
- sockets for the kettle, coffee machine and microwave wherever the design puts them.
We measure heights from the finished floor level, allowing for the screed and tiles. Measured from the bare slab, a socket above the worktop ends up lower by the full thickness of the future floor and may disappear behind the upstand. In a studio apartment we put the light over the worktop on its own switch by the kitchen: the kitchen can be seen from the bed there, and it is handier to switch it off separately from the main lights.
Cooker hood, duct and fresh air supply
A cooker hood extracts only as well as its duct allows. We use a diameter no smaller than the outlet on the hood itself and keep the run short, with two or three gentle bends instead of sharp corners. Where the duct enters the ventilation shaft we fit a non-return valve: without one, cold air and other people's smells come down the shaft in winter. The duct is hidden in a plasterboard ceiling, so the kitchen ceiling type is chosen before the rough work.
Before connecting the hood, we check the draught in the shaft. We don't connect a hood to a shared collector shaft that serves the kitchens of several floors: it would push smells into the neighbours' apartments. We connect it to a separate shaft, if there is one, and fit a grille with an extra opening so the kitchen is ventilated even when the hood is off.
In a closed-up apartment a hood works worse than its specifications promise: air has nowhere to come in, so the hood pulls it through the bathroom ventilation shaft, along with other people's smells. That is why we fit a fresh-air inlet valve in the kitchen or the next room. In a kitchen-living room with fixed floor-to-ceiling windows, we plan the air supply together with the air conditioning.
Water, drains and valves
Before running the pipes we look at the riser and the valves on the branches. In a resale apartment it is best to replace the steel section of the riser in the kitchen now, before the units cover it, and agree the day the water is off with the building. The sink is simplest left by the riser: every metre further away needs a fall in the pipe and eats into the height under it.
Each supply gets its own valve: the mixer, the dishwasher, the drinking water filter and a fridge with an ice maker. The valves go in the unit under the sink, within arm's reach of its door. We connect the dishwasher hose to the trap spigot above the water seal and loop it up under the worktop, so dirty water from the sink doesn't run back into the machine.
If the building has gas, we don't touch the gas pipe, the meter or the cooker connection: that isn't our work, and moving a gas point has to be discussed with the gas supply company in advance. Before plastering we cap the water and drain outlets and photograph their positions with a tape measure from the floor and the corner.
Splashback, walls and floor
The splashback covers the wall between the worktop and the wall units, usually to a height of 550–650 mm. We lay ceramic tiles before the units are installed and take them a few centimetres below the future worktop, so no bare wall is left at the joint. Glass or a single porcelain sheet goes up after the worktop, to its actual level, and the socket cut-outs are marked in advance. How the materials cope with water and grease is covered in the comparison of ceramic and porcelain tiles.
We fill the joints behind the hob and by the sink with epoxy grout. Cement grout soaks up grease, darkens and then won't wash clean. Walls outside the splashback get washable paint that stands up to a sponge.
For a kitchen floor, porcelain tiles and water-resistant SPC vinyl both work. Laminate by the sink and dishwasher risks swelling at the very first leak; there is more on this in our look at laminate and SPC vinyl. In a kitchen-living room we put the joint between the two floor coverings along a line set by the furniture, such as the edge of the island, and bring them level at the screed stage so that no threshold strip is needed.
How much a kitchen renovation costs in Batumi
Renovating a kitchen of about 10 m², without furniture, costs from 5,400 ₾, with the usual range up to 7,800 ₾. This covers labour and rough-work materials: strip-out, electrics and water to the design, wall levelling, screed, splashback and floor. The units, worktop and appliances are not included: the units are priced separately, per linear metre.
Within the estimate, the price is made up of individual items. Laying wall tiles costs from 66 ₾ per m², each new electrical point from 42 ₾ and each plumbing point from 96 ₾. A kitchen where the developer's outlets match the design is closer to the lower end. Moving the sink to the window, five or six new circuits from the consumer unit and a splashback in large porcelain tiles push the estimate towards the upper end.
The final cost is set after the site measurement and once the estimate is agreed, and the price of each stage is fixed in the contract.
Measuring for the units and fitting them
We book the final measurement for the units once the walls are level and the floor is down. While the kitchen is being made, the crew tiles the splashback, paints the walls and puts up the ceiling, so by the time the fitters arrive there is no wet or dusty work left in the kitchen.
Before installation we give the fitters the routing diagram from the handover file. The wall units are fixed to the wall that carries the cables to the sockets above the worktop, and without the diagram a drill can easily hit a cable. We connect the appliances after the units are in: we test each circuit under load, run the dishwasher through a trial cycle and check the joints under the sink for leaks.
Stages and timelines
-
Design and appliance list
2–4 days
We get the kitchen design from the furniture maker or designer, check the appliance models and mark the future units on the walls.
-
Strip-out
1–2 days
We remove the old kitchen, tiles and floor covering, and check the riser and the draught in the ventilation shaft. In white frame this stage is shorter.
-
Electrics, water and duct
3–5 days
We run circuits from the consumer unit, bring out water and drains to the design and install the hood duct. The runs are photographed before they are closed up.
-
Walls, screed and floor
1–2 weeks
We level the walls, lay or correct the screed and put down the floor covering. After that the furniture maker takes the exact measurements.
-
Splashback, ceiling and painting
4–6 days
We tile the splashback, put up the ceiling with the hood duct boxing and paint the walls while the units are being made.
-
Installation and connection
2–3 days
The fitters install the units, and we connect the appliances and check every circuit and joint. A stone worktop and a glass splashback are measured from the installed units, and the sink and hob are connected once they are made.
Local specifics in Batumi
Many apartments in Batumi stand empty for months, especially in winter. The water in the sink trap dries out in that time and a sewer smell comes into the kitchen, so we fit a trap with a dry seal that blocks the smell even without water. Under the sink we install a leak sensor with an automatic shut-off valve: if a supply hose starts leaking while nobody is in the apartment, the water shuts off by itself.
If the units stand against an external wall, condensation collects behind them in winter, and mould there is only noticed once the cupboard starts to smell. Before painting, we treat such a wall with an antifungal primer and ask the furniture maker to leave a gap between the carcasses and the wall.
An induction hob and a dishwasher are sensitive to voltage swings in the mains supply, and their control boards are expensive. We fit a voltage monitoring relay in the consumer unit on the apartment's incoming supply, or at least on the kitchen circuits: if the voltage goes outside the permitted limits, the relay cuts power to the appliances and switches it back on when the supply returns to normal.
Materials and brands
Splashback tiles are easy to choose at the VitrA showroom in Batumi, from Roca and from Spanish brands such as Halcon. The tile itself can be ordinary wall tile, but the grout is not the place to save: we use epoxy grout from Mapei or Litokol and adhesive from Ceresit or Weber.
Sockets above the worktop come from the Legrand, Schneider Electric or ABB ranges that include models with a cover. A pull-out mixer is a good buy from Grohe or Hansgrohe: Grohe has its own shop in Batumi, so a replacement cartridge is easy to find later. Choose appliances to fit the recess sizes in the design.
What makes up the cost
Timeline: 3–5 weeks to renovate a kitchen of about 10 m² without moving the sink; the units take 3–5 weeks to make after measuring, partly in parallel
- the kitchen is open to the living room: the floor and lighting are priced together
What raises the cost
- moving the sink far from the riser or into an island
- separate circuits for powerful appliances and a new consumer unit
- a splashback in large porcelain or glass made to a template
- hood duct boxing in the ceiling and a new ceiling
What lowers the cost
- the developer's outlets match the kitchen design
- standard-size tiles, and painted walls outside the splashback
We prepare the exact estimate from measurements and photos. It’s free and comes with no obligation.
Get an estimateGuarantees
A 2-year warranty on work and 5 years on pipes and cables in walls.
Appliances and mixers carry the manufacturer's warranty, and their connection carries ours. Leaks and failed circuits are dealt with first: if water gets under the units, close the valve under the sink and message your manager on WhatsApp.
Questions and answers
How much does a 10 m² kitchen renovation cost in Batumi?
Renovating a kitchen of about 10 m² without furniture costs from 5,400 ₾, with the usual range up to 7,800 ₾. This covers labour and rough-work materials: strip-out, electrics and water to suit the kitchen design, walls, screed, splashback and floor. The units, worktop and appliances are priced separately.
Send photos of the kitchen, a plan and the furniture design, and you will get a preliminary estimate within 24 hours on business days. The final cost is set after the site measurement and once the estimate is agreed. If the developer's outlets are already where they need to be, the price is closer to the lower end.
Should tiles and flooring go under the kitchen units?
We do lay the floor under the units. A leak from under the dishwasher or sink then won't run under the floor covering in the next room, and when the kitchen is replaced in a few years there will be no step and no strip of bare screed. Saving a couple of square metres of flooring isn't worth those problems.
We don't tile the wall behind the base units: nobody will see it, and the extra thickness only pushes the cabinets away from the wall. That wall is levelled, primed and painted, and tiles are needed only in the splashback area.
Can the sink go in a kitchen island?
Yes, but water, drains and electrics then have to reach the island through the floor. The drain pipe needs a fall of 2–3 cm per metre, and over several metres it can't be hidden in a screed of normal thickness. So for an island the floor is raised across the whole kitchen, a platform is built under the island, or a pumped drain is fitted, which is noisy when it runs and needs servicing.
A sink by the window is easier: the pipe usually runs along the wall behind the base units, provided the connection to the riser is low enough. At the site measurement the foreman measures the height of the connection and works out how many centimetres the fall will take. If raising the floor creates a step at the kitchen entrance, you will see it on the design before work starts.
Can a kitchen hood be vented outside through the wall?
Technically yes, but it depends on the building's rules and the wall construction. A hole changes the facade, so we first ask the management company whether grilles are allowed on the facade and where. We check the wall in the building documents: under the 2026 rules, load-bearing structures can only be altered with a design and a permit, and in block infill walls the hole is drilled with a diamond core bit, without percussion tools.
If venting out is allowed, we fit a flap on the outside grille that closes against the wind from the sea, and run the duct with a slight fall outwards so condensation doesn't flow back into the hood. If neither the wall nor a separate shaft is possible, the remaining option is a recirculating hood, and then the apartment especially needs a supply of fresh air.
Is the apartment's power supply enough for an induction hob?
It depends on how much power is allocated to the apartment and what else runs at the same time. An induction hob draws a lot only at its highest settings, and on many models its maximum power can be capped in the menu. The trouble starts in the evening, when the oven, the water heater and the air conditioners are on along with the hob.
So before the wiring goes in, we check the allocated power in the documents or on the main breaker and calculate the load from the appliance list. If there is no margin, we cap the hob's power, move water heating to the night, or you apply to the power company for a higher capacity.
Further reading
Send kitchen photos and the furniture design, and we'll price the work in 24 hours
We reply within an hour during business hours. Message us or leave a request: we’ll call you back, go over the details and suggest the next step.
Mon–Fri 10:00–19:00, Sat 11:00–16:00