
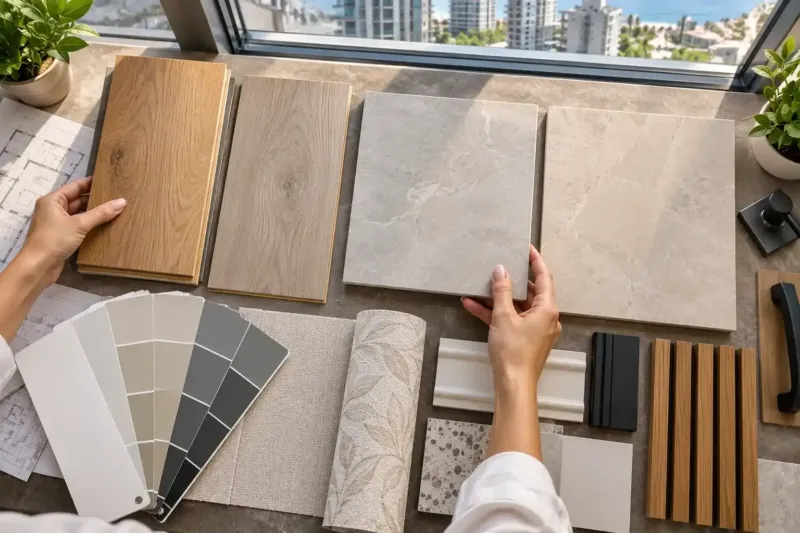
Microcement vs tiles: which to choose for a bathroom in Batumi
If you're weighing microcement vs tiles for the shower and bathroom floor of a rental apartment, ceramic or porcelain tiles are the safer choice. The result is predictable, a tiler's work is easier to check, and a chipped tile is swapped for a spare. Microcement gives walls and a floor without joints, but it needs a base that doesn't move, waterproofing underneath and an applicator whose bathrooms have held up for years. If you have all that and the apartment is your own, microcement is a sound choice in Batumi.
Updated 17 October 2026
Comparison by criteria
| Criterion | Microcement | Tiles |
|---|---|---|
| Wet areas | Watertight while the protective sealer is intact | Reliable, but the joints are the weak point |
| Base movement | Cracks in the base show through | Joints and adhesive take up small movements |
| Joints | No joints, so nothing to darken | Has joints, epoxy grout needed in the shower |
| Chip repairs | A patch often shows a different shade | One tile is swapped for a spare |
| Cleaning and care | No acids or abrasives, and the sealer needs renewing | Ordinary household cleaners |
| Tradesman | The result depends on the individual applicator | A tiler's work is easier to check |
| Time to finish | Longer: coats need to dry, slower in the wet season | Shorter: the bathroom is ready sooner |
| Thickness | A few millimetres, so the floor level barely rises | Adhesive and tiles raise the floor level |
| Cost of the work | Higher | Lower |
Microcement and tiles work differently
Microcement is applied by hand in several thin coats, while tiles are laid one by one on adhesive. In total the microcement ends up a few millimetres thick. The surface is then sanded and finished with a protective sealer that keeps out water and dirt. The finish is continuous and copies everything beneath it: bumps, joints and cracks.
With tiles, each piece sits on its own bed of adhesive, and the joints between them absorb small movements of the base. If something goes wrong, the damage stays within one tile or one joint. A crack in the base under microcement runs through the finish, and on a smooth, even surface you can see it from across the room.
Microcement vs tiles in wet areas
Whichever finish you choose, a shower needs a liquid waterproofing membrane underneath, carried up onto the walls. We photograph it before it is covered, and the photos go into the handover file. Tiles themselves let almost no water through. Their weak point is the joints, and epoxy grout largely solves that problem.
Microcement keeps water out only while the sealer is intact. Where feet or a harsh cleaning product have worn the sealer away, the finish starts to absorb moisture and darken. The sealer wears fastest on the shower floor and has to be renewed from time to time. How often is set by the manufacturer of the system, and it is worth finding out before you choose.
Batumi's humidity also affects the work itself. Each coat has to dry before the next one goes on, and when humidity stays at 70–80% and rises higher in winter, drying takes longer than under the standard conditions given in the instructions. That is why you can start using a microcement bathroom later than a tiled one.
The base: screed, plasterboard and new builds
A thin finish needs a base that does not move. In a new build the structure keeps moving for the first few years: the building settles, the floor slabs deflect under the weight of screeds, furniture and people, and hairline cracks appear where concrete, masonry and plasterboard meet. Under tiles you don't see them, but on microcement they come through as a thin line.
The risk can be reduced. The screed is dried until a moisture meter shows it is ready, joints between different materials are reinforced with mesh, and plasterboard bathroom partitions are built on a rigid frame. On a base that moves, a crack cannot be ruled out completely, and an honest applicator tells you so before the work starts. In older buildings the settling finished long ago, but we check the old screed by tapping it: if it is crumbly, it is no good under a thin finish.
Repairs and care
A chipped tile is fixed by replacing that one tile, as long as there are spares from the same batch in the apartment. Microcement can also be repaired in place: the area is sanded down, then new material and sealer are applied. But on a smooth surface in a single colour the patch often shows in shade and texture, and sometimes it is simpler to recoat the whole wall.
In an apartment you rent out, this means that serious damage, such as a dropped bottle or hair dye on the floor, has to be repaired by a microcement specialist. If you live abroad, you will have to call them out and accept their work remotely. With tiles, a tiler does this kind of job in one or two visits.
Microcement is also more demanding to clean. Acidic limescale removers and abrasive powders can damage the sealer, so your cleaner needs a short note on what to use and what not to use. Tiles with epoxy grout are cleaned with ordinary household products.
The applicator and the cost of the work
A tiler's work is easier to check: you can see on site straight away whether the surface is flat and how the joints and layout look. With microcement, everything depends on the skill of the individual applicator, and mistakes in application show up months later, when the bathroom is already in use. Before you order, ask to see microcement bathrooms that have been in use for years and to have a test patch done in your own apartment.
Microcement usually costs more in labour: there is a lot of hand work, drying between coats, sanding and several coats of sealer. Mistakes cost more too, because the whole surface has to be redone. In the same bathroom, tiles are cheaper in labour and quicker to finish.
Which to choose
When to choose: Microcement
Microcement makes sense when a surface without joints matters more to you than easy repairs, and you are ready to follow the cleaning rules. It is a finish for an owner who lives in the apartment and sees it every day.
- An apartment for yourself, not for short-term rental
- Bathroom walls outside the shower, a kitchen or a hallway, where there is little water
- A base that has settled: an older building or a screed dried to the right moisture level
- An applicator whose microcement bathrooms have held up for years
- Refreshing the finish while barely raising the floor level
When to choose: Tiles
Ceramic and porcelain tiles are the better fit where there is a lot of water and nobody has the time or the chance to look after the finish. A mistake costs less here, and small repairs are within reach of any ordinary tiler.
- A shower without a tray and the bathroom floor in a rental apartment
- A new build in its first years, while the building is still settling
- Plasterboard bathroom partitions
- Living abroad, with no quick way to call out a microcement applicator
- A bathroom that has to be ready for the season
Questions and answers
Can you use microcement in a shower?
Yes, if certain conditions are met. Under the finish you need a liquid waterproofing membrane carried up onto the walls. The microcement itself should come from a system made for wet areas, and the sealer must be rated for constant contact with water. On a shower floor, an anti-slip additive goes into the final coat of sealer.
The details around the drain, the mixer tap and the joint between wall and floor are planned separately, and they are checked first. In a shower the sealer wears off over time, so build its renewal into the care plan from day one.
Why does microcement crack?
Most often the crack comes from the base. The screed was not dried long enough, the joint between concrete and plasterboard was not reinforced, or the floor slab deflected under load, and the thin finish followed that movement. Less often the cause is the application itself: a coat that is too thick, drying in a cold, damp room, or coats applied in the wrong order.
You reduce the risk by checking the moisture in the base, using reinforcing mesh at the joints and giving each coat time to dry. With a new build in its first years after completion, we warn you in advance that a hairline crack in microcement is possible even when everything is done correctly.
Can microcement be applied over existing tiles?
Technically, yes. The tiles are degreased and primed, the joints are filled level and reinforced, and then the coats go on. But first every tile is tapped. If it sounds hollow, the tile is poorly bonded, and the new finish will come away with it.
The second question is what lies under the old tiling. If the bathroom never had waterproofing, a new layer on top will not replace it, and water will still find its way into the floor slab. In that case we take the old tiles off, do the waterproofing and only then choose the finish.
How do you look after microcement in a bathroom?
Clean it with pH-neutral products and a soft sponge. Acidic limescale removers, chlorine-based cleaners and abrasive powders can damage the sealer, and without the sealer the finish starts to soak up water. A squeegee after each shower helps: less limescale builds up, so you need to clean less often.
In wet areas the sealer is renewed at the intervals the system manufacturer gives. If the apartment is rented out, leave a printed note for the cleaner and keep the right type of cleaning product in the apartment.
Send your bathroom plan and we'll mark where microcement or tiles go
We reply within an hour during business hours. Message us or leave a request: we’ll call you back, go over the details and suggest the next step.
Mon–Fri 10:00–19:00, Sat 11:00–16:00